GTX2 is a smartwatch that can provide health data management and fitness tracking. It not only supports Bluetooth calls and message notifications, but also has a variety of built-in practical functions to help you enjoy a smart life.
* The health detection function of the GTX2 smartwatch is intended to provide reference data and cannot be used for medical diagnosis.
This user manual will help you start using the GTX2 smartwatch and explore its rich functional applications. Before use, please charge and activate your GTX2 smartwatch and complete the pairing through the Runmefit app.
Product Overview
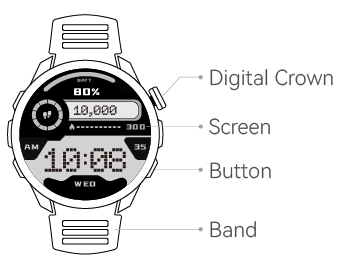
Front
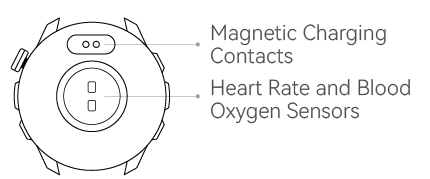
Back
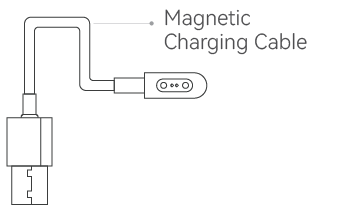
Charging cable
Before first use
|
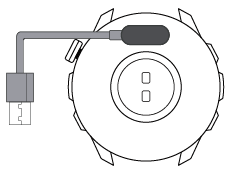
Charge |
Simply touch the magnetic charging cable connector to the charging point on the bottom of the watch to charge. |
|
Power on |
Charge or press and hold the crown for 4 seconds to activate the device and turn it on. |
Note: Please use a power adapter with a rated voltage of 5V for charging to avoid damaging the watch.
APP download and connection
To connect the watch to your smartphone, you need to install the Runmefit app.
How to download the Runmefit app:
|
1 |
Search for "Runmefit" in the mobile App Store or Google Play Store to download and install it. |
|
2 |
Or scan the QR code below to download from the website. |

How to connect to the Runmefit app:
Before connecting, please make sure your phone's Bluetooth is turned on. Be sure to connect the watch through the Runmefit application (hereinafter referred to as the app). Do not connect directly through the Bluetooth settings in the phone system.
1. Connect via search:
|
1 |
Turn on the watch screen and hold it as close to your phone as possible. |
|
2 |
Open the app. |
|
3 |
Go to Devices > Add Device. |
|
4 |
Find the corresponding device Bluetooth name in the Bluetooth search box that pops up and click to bind. |
|
5 |
Confirm or agree to the binding request on the watch. |
The device's Bluetooth name is usually displayed as "GTX2 -****", where "****" is usually a random combination of numbers and letters.
2. Connect via QR code:
|
1 |
Turn on the watch screen and hold it as close to your phone as possible. |
|
2 |
Launch the app and go to the Devices page. |
|
3 |
Click the "" icon in the upper right corner to scan the code for pairing. |
|
4 |
Confirm or agree to the binding request on the watch. |
Note: If you need to connect using a QR code, go to Settings > Connect Phone on your watch to view the connection QR code.
Problems you may encounter when connecting:
Why can't I search for my device in the app?
Please check the following:
|
1 |
Make sure your phone's system Bluetooth is turned on. |
|
2 |
Make sure the watch is not connected to the phone system Bluetooth. |
Note: The app will automatically block devices connected to the system Bluetooth when searching for nearby devices. Therefore, if the watch is already connected to the phone's system Bluetooth, the device cannot be searched in the app.
If your watch is already connected to your phone via Bluetooth, please follow the steps below:
|
1 |
Enter the system Bluetooth settings of your phone. |
|
2 |
Find the corresponding device Bluetooth name in the list. |
|
3 |
Tap Unpair or Forget This Device to disconnect. |
|
4 |
Restart your device and connect again through the app. |
Instructions
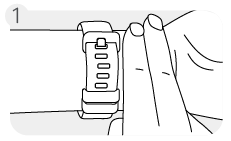
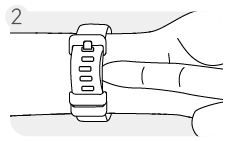
1. How to wear
In order for the watch to measure your data more accurately, please put the sensor side of the bottom of the bracelet in contact with the front of your skin. There should be at least a finger's width of distance between the edge of the strap and your wrist.
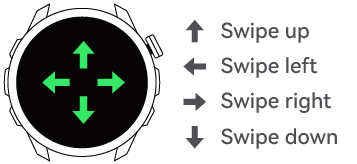
2. Touch screen operation
Support full-screen touch (slide, touch, long press)
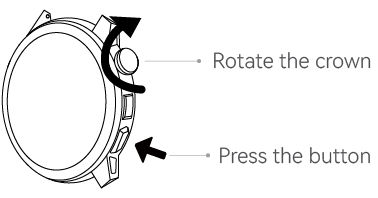
3. Crown/button functions
|
Click the crown |
Turn on the screen/enter the app center/exit the app |
|
Rotating crown |
Browsing long interface of message and menu list |
|
button |
Enable shortcut function (default is sports mode, can be adjusted in settings) / long press to enter SOS |
Function Introduction
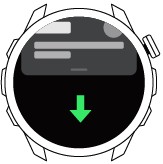
Ⅰ.Notifications
Swipe down from the main watch face to access the Notifications.
In the Runmefit app, you can set the apps that you want to receive notifications on your smartwatch, and you can also disable notifications for certain apps.
To sync notifications from an iOS system phone:
|
1 |
Make sure the Bluetooth of the phone you paired your watch with is turned on and is within the connection range of the watch (within 10 meters). |
|
2 |
In the system Bluetooth, enable the "Share system notifications" permission for your watch Bluetooth. |
To sync notifications from an Android system phone:
|
1 |
Make sure the Bluetooth of the phone you paired your watch with is turned on and is within the connection range of the watch (within 10 meters). |
|
2 |
Make sure the phone system has granted the Runmefit app permissions such as "Bluetooth", "Location", and "Notifications"; and keep the App running at all times |
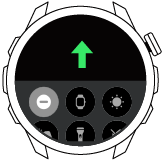
Ⅱ.Control Center
Swipe up from the main watch face to bring up the control center, where you can access functions such as "Focus mode, Always-on display, Water lock," and adjust settings like "Brightness".
Status Information
|
|
Battery: Indicates the current remaining battery level of the watch. |
|
|
Bluetooth connection: Shows the Bluetooth connection status between the watch and the paired phone. |


Quick Settings
|
|
Focus: Allows you to choose sleep mode or do not disturb mode. |
|
|
Sleep: Disables always-on display and wrist raise functions, and adds do not disturb mode. |
|
|
Do not disturb: Disables sound notifications for messages and calls, but alarms and timers still function. |
|
|
Always-on Display : Enables the always-on display feature, where the screen remains on even in the dimmed state. |
|
|
Raise to Wake: Enables the wrist raise feature, with the screen automatically lights up when you raise your wrist. |
|
|
Flashlight: Opens the flashlight app and emits light from the watch. |
|
|
Lock/Water lock: When enabled, the watch will be locked to prevent water damage. Press and hold the crown to unlock and dry. |
|
|
Find My Phone: Helps you locate your paired phone when it is nearby. |
|
|
Sound Alerts: Activating this option will switch to silent mode. |
|
|
Screen brightness: Adjusts the brightness of the screen by swiping up or down. |


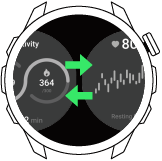
Ⅲ.Tiles
To switch quickly between the Suggestions, Activity, Heart Rate, Sleep, Weather, or Workout tiles, swipe left or right on the watch face screen.
|
Activity |
You can check the number of steps, calories and distance for the day. |
|
Heart rate |
Heart rate measurement will automatically start on this page; you can view the heart rate data for the last 6 hours. |
|
Sleep |
View your sleep time, sleep and wake-up times, and sleep data for the past seven days. |
|
Suggestions |
Recently used apps, quick browse of health, exercise and other data, and control of music playback. |
|
Weather |
You can view the weather conditions in the last 12 hours. |
|
Exercise |
You can check your exercise status for the week and quickly start the most recent workout. |
Ⅳ.Watch Face
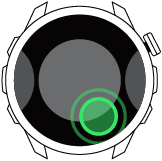
1. Change the watch face: Press and hold the screen for 1 second on the watch face to enter the list of watch faces.
2. Add a new face:
|
1 |
In the app, go to the Face Gallery and select your favorite watch face. |
|
2 |
After editing your favorite watch face in "Face Gallery", tap "Install" |
3. Personalization settings:
a. Photo Watch Face: You can add multiple photos as the wallpaper for your watch face and quickly switch between them by tapping on the watch face.
4. Enable Always-on Display:
|
1 |
In the Control Center, you can quickly toggle the "Always-On Display" setting for the watch face |
|
2 |
In the watch's "Settings → Display & Brightness", you can turn on or off the watch face's "Always On Display" |
5. Status Bar:
Priority: Water lock > Sleep > Do not disturb > Notification dot > Low battery
|
|
Water lock: When the water lock mode is enabled, a water lock icon will be displayed at the top of the watch face. |
|
|
Sleep: When sleep mode is activated, a sleep icon will appear at the top of the watch face. |
|
|
Do not disturb: When do not disturb mode is enabled, a do not disturb icon will be shown at the top of the watch face. |
|
|
Unread indicator: When the notification dot reminder is enabled and there are unread notifications, a dot will be displayed at the top of the watch face. |
|
|
Low battery: When the battery level is below 20%, a low battery notification will be shown at the top of the watch face. |


Ⅴ.Activity and Health
1. Daily Activity Records
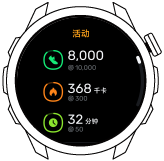
Browse Activity Data
|
1 |
Press the crown of the watch to enter the application center and select "Activity" to enter the application to view activity calories, exercise time, standing time, steps and distance, as well as the day's exercise data and breathing training data |
|
2 |
On the right side of the watch face, you can quickly browse key information in the quick card "Activity" |
Set goals: You can set daily goals for activity in the Runmefit app.
2. Stepping
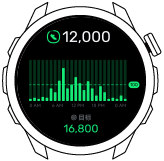
Record the step count every hour.
|
1 |
Press the crown of the watch to enter the application center, and click "Step Count" to enter the step counting interface |
|
2 |
Average number of steps per day |
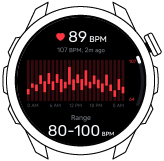
3. Heart Rate
The watch is equipped with a wrist optical sensor that supports 24-hour continuous measurement and recording your heart rate, helping you monitor changes in your health condition.
|
1 |
Press the crown of the watch to enter the application center, click "Heart Rate" to enter the heart rate interface, wear the watch normally, and lay your arm flat. |
|
2 |
Stay still for 10 seconds to measure your current heart rate |
You can browse more historical data about stress through the app.
All-day automatic measurement: When the watch is connected to a phone, you can go to the app to turn on or off all-day automatic tracking. After turning it on, when you wear the watch, it can automatically measure and record your heart rate changes all day long.
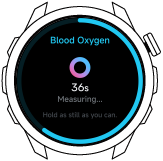
4. Blood oxygen
|
1 |
Press the crown of the watch to enter the application center, click "Blood Oxygen" to enter the blood oxygen interface, wear the watch normally, and lay your arm flat |
|
2 |
Click "Start Measurement" and stay still for 30 seconds to measure your current blood oxygen saturation value. |
You can browse more historical data about stress through the app.
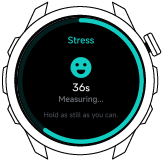
5. Stress
|
1 |
Press the crown of the watch to enter the application center, click "Stress" to enter the pressure interface, wear the watch normally, and lay your arm flat |
|
2 |
Click "Start Measurement" and stay still for 20 seconds to measure your current pressure value. |
You can browse more historical data about stress through the app.
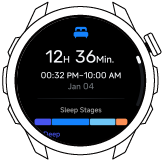
6. Sleep
|
1 |
Press the crown of the watch to enter the application center, click "Sleep" to enter, and then you can view your sleep records. |
|
2 |
The watch will display the sleep data of the day and the time of each sleep stage |
You can browse more historical data about stress through the app.
7. Menstrual cycle

|
1 |
Press the crown of the watch to enter the application center, click "Menstrual Cycle" to enter the menstrual cycle interface. When you are menstruating, you can quickly record your menstrual period and menstrual status in the menstrual cycle tracking application. |
|
2 |
The watch will automatically calculate according to the cycle you set, and predict the dates of key stages such as future menstruation, pregnancy window, safe period, etc. |
After syncing to the app, you can also browse the history or check the menstrual forecast more conveniently.
Ⅵ.To track your workouts
Go to the "Workout" option and select the type of workout you want to track.
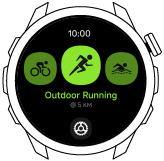
Workout
The watch supports 60 different sports modes, including outdoor walking, indoor walking, outdoor running, indoor running, outdoor cycling, indoor cycling, elliptical, yoga, and more.
Choose the appropriate exercise mode based on your activity.
Start Workout:
|
1 |
Press and rotate the crown to enter the application center, click "Exercise" to enter the exercise interface, and swipe left and right to select the most recent exercise |
|
2 |
During exercise, press and rotate the crown to pause the exercise |
|
3 |
During exercise, you can swipe left or right to "pause exercise", "end exercise", "control the phone to play music", etc. |
|
4 |
After each exercise, you can view detailed exercise data on the end interface |
GPS positioning:
When you are doing outdoor sports, the watch GPS needs to maintain a connection with the satellite. Please note:
|
1 |
When starting positioning, you need to wait for GPS to connect to satellites. In open areas, the positioning time can be greatly shortened. |
|
2 |
When the “➡️” icon flashes, it means positioning is in progress. When it stops flashing, it means positioning is successful. |
|
3 |
When passing through tunnels, dense forests, tall buildings, or under bridges, the connection with the satellite may be affected, resulting in temporary signal loss. Please try to do outdoor sports in open areas. |
Note:
• If the exercise time is too short, the results will not be recorded.
• After completing each exercise session, please click the "End" button to ensure the accuracy of the recorded exercise data.
• You can view the detailed exercise data history by clicking on the exercise records in the Runmefit app page.
Ⅶ.More
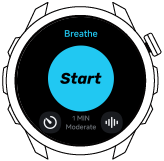
1. Breathe
|
1 |
Press and rotate the crown to enter the application center and click "Breathe" to enter the interface |
|
2 |
You can set the "breathing rate" or "training time", then click "Start" to start breathing training. |
|
3 |
Breathe in slowly as the animation expands, then breathe out as the animation closes. |
|
4 |
If you want to end the animation before it is complete, swipe right and tap End. |
2. Alarms

Set an alarm
|
1 |
Press and rotate the crown to enter the application center, and click "Alarms" to enter the alarm interface. |
|
2 |
Click the "+" sign to add an alarm. If you do not select a repeat date, it will be a single alarm. You can select a repeat alarm, such as daily, weekdays, weekends, or a specific repeat day. |
|
3 |
Tap the Done icon to complete the setup |
Reminder later: After setting the alarm, you can set the reminder later, which can help you delay the alarm reminder for 10 minutes.
End the alarm: The alarm will vibrate and ring. Click "Stop" to end the alarm. If the reminder function is turned on, click "Remind later" to delay the reminder for 10 minutes.
Delete an alarm: On the "Alarm" interface, click the alarm you want to delete to enter the alarm editing interface, and click "Delete" to delete the alarm.
3. Phone
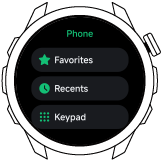
Click "Phonel" in the App Center to enter the call process. You can browse recent call records and frequently used contacts.
|
1 |
You can make calls through recent call records, favorite contacts, and dial keys. |
|
2 |
When your phone receives an incoming call, you can tap the "Answer Button" to answer the call on your watch. |
|
3 |
Frequent contacts can be set in the app. Click "Device Management" - "Calls", edit and add/delete in the Frequent Contacts. Up to 20 frequent contacts can be added. |
Note: The call needs to be made within a good communication distance with the mobile phone's Bluetooth.
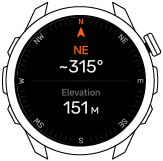
4. Compass
In the App Center, click "Compass" to enter the app
|
1 |
You can determine the actual direction you are facing by the direction of the arrow and the scale. |
|
2 |
The directions and readings displayed on the screen can help you find the right direction |
|
3 |
The "altitude" displayed on the screen can tell you the height of your current location relative to the standard sea level. |
Note: Altitude is calculated by the air pressure sensor based on standard atmospheric pressure, and you need to connect to the app to calibrate the measurement accuracy. It is recommended to calibrate once every 12 hours, or open the app when you are ready to obtain altitude to ensure sufficient accuracy.
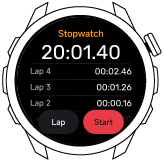
5. Stopwatch
|
1 |
Press and rotate the crown to enter the application center, and click "Stopwatch" to enter the stopwatch interface |
|
2 |
Click "Start" to start timing, click "Split" to count times, click "Stop" to pause timing, click "Reset" to reset the stopwatch to zero |
|
3 |
Swipe right or press the rotating crown to exit the stopwatch app without ending the stopwatch function |
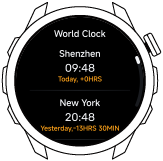
6. World Clock
|
1 |
Press and rotate the crown to enter the application center, and click "World Clock" to enter the world clock interface |
|
2 |
Here, time cards will be displayed according to the city, including: city name, current time, and time difference with the location city |
|
3 |
You can add or delete cities displayed in the world clock app, and you can also sort them as needed, with a maximum of 10 cities displayed. |
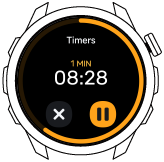
7. Timer
|
1 |
Press and rotate the crown to enter the application center, and click "Timer" to enter the timer interface |
|
2 |
You can choose the default timer, including: 1 minute, 2 minutes, 5 minutes, 10 minutes, 30 minutes, 60 minutes, click any time to start timing |
|
3 |
You can also choose a custom timer and set your countdown time. Click "Custom" to start the countdown, click "⏸" to pause the countdown, and click "❌" to end the countdown. |
8. Weather
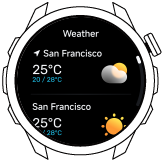
After you enable location permission in the app and sync it with your watch, you can view local weather information on your watch.
The weather conditions for the last 6 hours can be displayed at most. Please open the app at least once every 6 hours to synchronize the weather conditions.
Weather quick card: Swipe right twice on the main interface of the watch to enter the weather quick card. The screen will display your location, weather, temperature and other information.
Weather application: Press and rotate the crown to enter the application center, click "Weather" to enter the weather interface, and the screen will display your location, weather, temperature and other information;
9. Camera Remote

You need to turn on the camera function of your phone in advance and make sure that the Bluetooth connection between the watch and the phone is successful. During use, you need to ensure that the distance between the two is not too far, try to keep it within 10 meters and there are no objects blocking the way.
|
1 |
Press and rotate the crown to enter the application center, click "Camera Remote" to enter the remote photography interface |
|
2 |
You can control the phone's camera to take pictures by clicking the "shutter button" |
|
3 |
Please make sure your watch is connected to your phone and turn on the camera function on your phone. |
10. Music
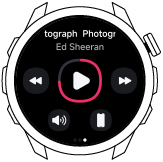
When the watch and phone are connected, you can control music playback on the watch. If they are not connected, it will prompt you to connect to the app.
|
1 |
Press and rotate the crown to enter the App Center, and click "Music Control" to enter the music control page. |
|
2 |
Click the "Play/Pause" button to control the phone to play or pause |
|
3 |
Click the "Volume Key" to increase or decrease the volume and rotate the button to control the volume decrease and increase respectively. |
|
4 |
Click "Previous" or "Next" to switch to the previous song or the next song. |
Tip: It is recommended to use the system's built-in or mainstream music player, otherwise you may not be able to control the phone to play music due to compatibility issues.
11. Find my phone
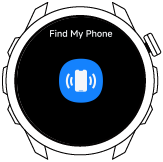
Make sure the watch and phone are connected and the app is open.
|
1 |
Press the crown of the watch to enter the application center, and click "Find My Phone" to enter the music control page |
|
2 |
Click the icon and the phone will ring and vibrate |
Note: iPhone requires the phone to be in unmuted mode.
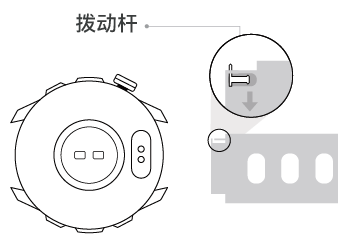
Change the Band
Remove band
1. Lift the spring bar from the groove.
2. Push and hold the spring bar.
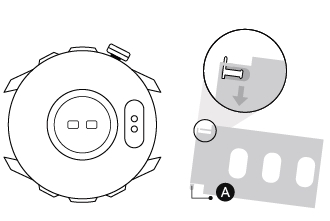
Install band
Insert the metal pin at position "A" in the picture below into the hole where the band is connected
1. Push the lever toward the other side of the strap and hold it
2. Press the band into the watch body
3. Pull the band to confirm successful installation
Precautions
• Disassembling the watch by oneself, except for replacing the strap, will void the warranty and compromise safety.
• Avoid forcibly opening the watch case, as it may cause short circuits and overheating.
• Keep the watch away from environments exceeding 60℃ to prevent battery leakage or explosion.
• While the product complies with IP68 waterproof standards, it is not recommended for activities such as bathing, diving, or water skiing that involve high temperatures, steam, or rapid water flow. Note that the waterproof performance may be compromised if the product structure is damaged.
• The watch should be regularly cleaned to prevent dirt and dust buildup. Gently wipe the surface with a soft cloth to keep the watch clean and dry, avoiding the use of excessively damp cloths or any external heat sources (e.g., hairdryers) to dry the watch. Do not clean it while charging and do not use cleaning products or compressed air for cleaning.
• Do not forcefully press the digital rotating crown of the watch, as this may cause damage that is not covered by the warranty.
• When connecting the charging cable with the charging components, avoid bending the cable sharply or combining it with any other metal wires or cables. Regularly check the cable and interface for tangles, breakage, bending, or other damage.
• Be aware that firmware upgrades can lead to interface and usage changes. For detailed information, please refer to the product's upgrade instructions.
• In the event of abnormal situations such as safe mode, sensor malfunctions, or interface lagging, perform a 12-second long press on the button to restart and restore the watch.
FAQ
- How do I connect my device to the "Runmefit" app?
- Why does my device keep disconnecting from the "Runmefit" App?
- Why can't my device receive notifications?
- Why does the step count on my device differ?
- Why do my device's heart rate readings differ?
- Why is there no historical health data on my device or app?
- How do I use the Music Control and Remote Camera functions?
- Why can't the Runmefit app connect or find my device?
- How do I set the correct device time?
- Why doesn't my device light up when I flip my wrist?
- How do I download the "Runmefit" App?